Are your rugs in need of repair? Whether it’s a small tear or more significant damage, knowing how to fix your rugs can save you time and money. In this article, we’ll share essential DIY rug repair tips to help you restore your beloved rugs to their former glory. Additionally, we’ll guide you on how to choose the right rug repair service if you decide to seek professional help.
In the DIY section, you’ll learn how to mend small holes and tears, remove stains, fix frayed edges, and repair loose threads. We’ll provide step-by-step instructions and useful tips to ensure a successful rug repair project.
However, we understand that not everyone has the time, skills, or resources to undertake rug repairs on their own. That’s when a reputable rug repair service comes in handy. We’ll walk you through the process of selecting the right professional rug repair service that fits your needs, budget, and timeframe.
Don’t let damaged rugs detract from the beauty of your home. With the right knowledge and resources, you can repair your rugs and enjoy them for years to come. Let’s get started!
Common Rug Repair Problems
Rugs can face various types of damage over time, ranging from small tears and holes to frayed edges and loose threads. These issues not only affect the appearance of your rugs but can also lead to further damage if left untreated. It’s important to address these problems promptly to prevent them from worsening.
Small Tears and Holes
Small tears and holes are common issues that can occur due to wear and tear or accidents. They can be caused by pets, sharp objects, or heavy furniture. If left unattended, these small tears can expand and become more challenging to repair.
Stains and Spills
Accidental spills and stains are another common problem for rugs. Whether it’s a glass of red wine, a cup of coffee, or a pet accident, stains can be unsightly and difficult to remove. Immediate action is essential to prevent the stain from setting into the fibers of the rug.
Frayed Edges
Frayed edges occur when the edges of the rug start to unravel. This can happen due to heavy foot traffic, vacuuming, or poor rug construction. Frayed edges not only make the rug look worn out but can also lead to further damage if not repaired promptly.
Loose Threads
Over time, the threads of a rug can become loose or start to unravel. This can happen due to wear and tear, pets pulling on the threads, or poor rug construction. Loose threads not only affect the appearance of the rug but can also result in more significant damage if not fixed.
Benefits of DIY Rug Repair
Repairing your rugs yourself can be a rewarding and cost-effective solution. Not only does it save you money on professional repair services, but it also allows you to take care of your rugs promptly. Here are some benefits of DIY rug repair:
Cost Savings
By repairing your rugs yourself, you can save a significant amount of money compared to hiring a professional rug repair service. Most rug repairs are relatively simple and can be done with basic tools and materials.
Convenience
With DIY carpet cleaning and rug repair, you have the flexibility to work on your rugs at your own pace and schedule. You don’t have to wait for an appointment or rely on someone else’s availability. You can start the repair project whenever you have the time and energy.
Preserving Sentimental Value
If your rug holds sentimental value, repairing it yourself allows you to maintain the connection and memories associated with it. You can take pride in restoring the rug to its former glory and continue to enjoy its presence in your home.
Learning New Skills
Taking on a DIY rug repair project gives you the opportunity to learn new skills and expand your knowledge. You’ll gain a better understanding of rug construction, materials, and repair techniques, which can be valuable for future projects or general home maintenance.
Immediate Action
When you notice a problem with your rug, it’s best to address it as soon as possible to prevent further damage. With DIY rug repair, you can take immediate action and start the repair process right away. This helps minimize the risk of the problem worsening over time.
Tools and Materials Needed for DIY Rug Repair
Before you begin your DIY rug repair project, it’s essential to gather the necessary tools and materials. Having everything prepared in advance will make the process smoother and more efficient. Here are some essential tools and materials you’ll need:
1. Rug Repair Kit
Investing in a rug repair kit is a wise choice as it typically contains various tools specifically designed for rug repair. These kits often include items such as a rug hook, rug needle, latch hook, rug adhesive, and rug binding tape.
2. Scissors
A pair of sharp scissors is essential for trimming loose threads, cutting rug binding tape, or removing damaged sections of the rug.
3. Rug Cleaning Solution
To remove stains and spills, you’ll need a rug cleaning solution. Choose a product that is suitable for your rug’s material and follow the manufacturer’s instructions for safe and effective stain removal.
4. Rug Padding
If your rug has lost its padding or the existing padding is damaged, you may need to replace it. Rug padding provides cushioning, prevents slipping, and helps extend the life of your rug.
5. Rug Yarn or Thread
For repairing small tears and holes, you’ll need rug yarn or thread that matches the color and thickness of your rug. This ensures a seamless repair that blends well with the original rug.
6. Rug Fringe or Binding Tape
To fix frayed edges, you’ll need rug fringe or binding tape. These materials help secure and reinforce the edges of the rug, preventing further unraveling.
7. Grip Tape or Rug Pad Tape
If your rug tends to slide or move on the floor, grip tape or rug pad tape can provide additional stability. These products adhere to the back of the rug and keep it securely in place.
8. Masking Tape
Masking tape can be useful for marking areas that need repair or for securing loose threads temporarily.
9. Rug Brush or Comb
A rug brush or comb is handy for grooming the fibers of your rug after the repair to ensure a uniform appearance.
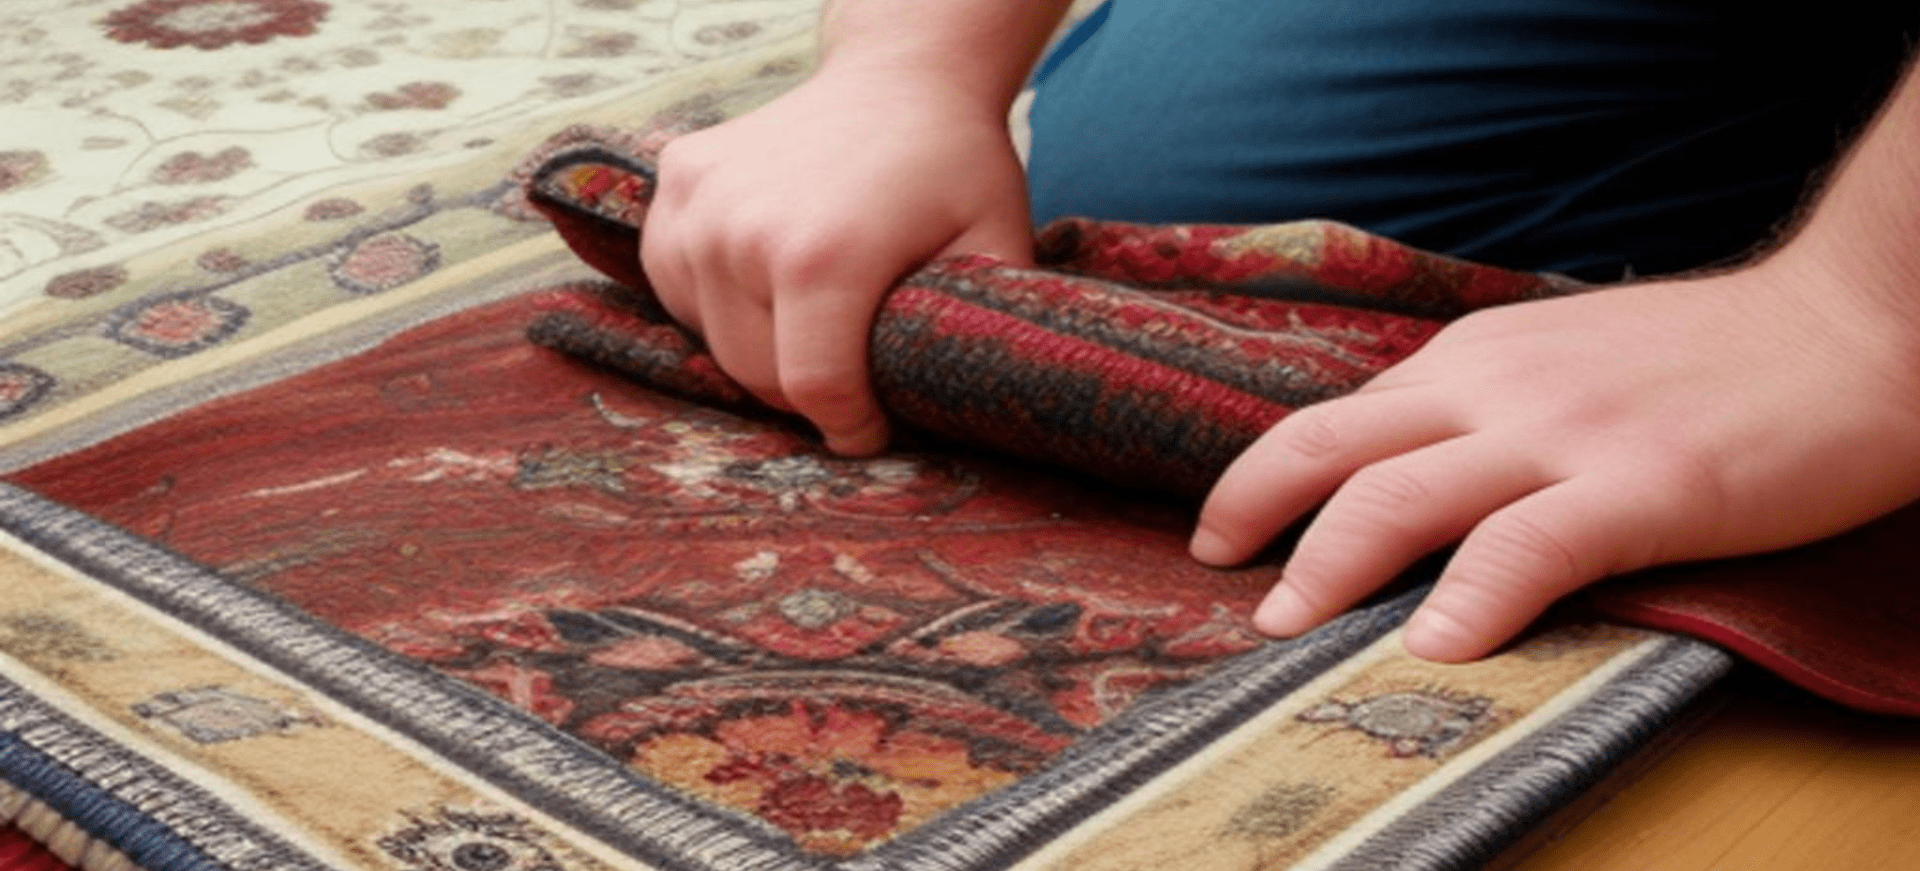
10. Protective Gloves
To protect your hands during the repair process, it’s advisable to wear protective gloves. This is especially important when working with adhesive or sharp tools.
Having these tools and materials on hand will make your DIY rug repair project more convenient and efficient. Now that you’re prepared, let’s move on to the step-by-step guide for repairing common rug issues.
Step-by-Step Guide to DIY Rug Repair
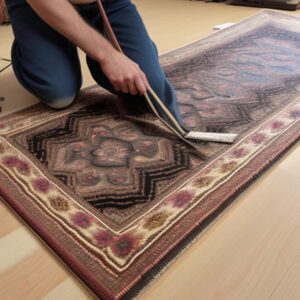
1. Mending Small Holes and Tears
Repairing small holes and tears in your rug is a relatively simple process. Here’s a step-by-step guide to help you mend these common issues:
Step 1: Clean the damaged area of the rug using a rug cleaning solution to ensure there is no dirt or debris.
Step 2: Trim any loose threads or fibers around the hole or tear using sharp scissors.
Step 3: Cut a piece of rug yarn or thread slightly longer than the size of the hole or tear.
Step 4: Thread the rug needle with the yarn or thread, and tie a knot at the end.
Step 5: Insert the needle through the backside of the rug, close to the edge of the hole or tear.
Step 6: Weave the needle in and out of the rug, creating small stitches that secure the edges of the hole or tear.
Step 7: Continue weaving until the entire damaged area is stitched together. Make sure the stitches are evenly spaced and tight.
Step 8: Tie a knot at the back of the rug to secure the thread, and trim any excess yarn or thread.
Step 9: Gently brush or comb the repaired area to blend the repaired section with the rest of the rug.
2. Removing Stains and Spills
Dealing with stains and spills on your rug requires quick action to prevent the stain from setting. Follow these steps to remove common stains effectively:
Step 1: Blot the stained area with a clean cloth or paper towel to absorb as much of the spill as possible. Avoid rubbing, as this can push the stain deeper into the rug fibers.
Step 2: Mix a rug cleaning solution according to the manufacturer’s instructions or use a recommended homemade solution.
Step 3: Dampen a clean cloth or sponge with the cleaning solution and gently blot the stained area. Avoid saturating the rug, as excessive moisture can damage it.
Step 4: Continue blotting until the stain starts to lift. For stubborn stains, you may need to repeat the process or use a specialized stain remover.
Step 5: Once the stain is removed, rinse the area with clean water to remove any residue.
Step 6: Blot the area with a dry cloth or paper towel to remove excess moisture.
Step 7: Allow the rug to air dry completely before placing it back in its original location.
3. Fixing Frayed Edges
Frayed edges not only make your rug look worn out but can also lead to further damage if left unattended. Follow these steps to fix frayed edges and prevent them from unraveling:
Step 1: Trim any loose or frayed fibers along the edge of the rug using sharp scissors. Be careful not to cut too close to the rug’s surface.
Step 2: Apply a small amount of rug adhesive along the frayed edge, following the manufacturer’s instructions.
Step 3: Press the frayed fibers back into place, ensuring they adhere to the rug adhesive.
Step 4: If the frayed edge is extensive, you may need to use rug fringe or binding tape to reinforce and secure the edge.
Step 5: Cut a piece of rug fringe or binding tape slightly longer than the frayed edge.
Step 6: Apply rug adhesive to the back of the tape and press it firmly onto the frayed edge, aligning it with the rest of the rug.
Step 7: Allow the adhesive to dry completely before handling or moving the rug.
4. Repairing Loose Threads
Loose threads can be unsightly and may lead to further unraveling if not fixed promptly. Follow these steps to repair loose threads on your rug:
Step 1: Identify the loose threads and gently pull them through to the backside of the rug.
Step 2: Apply a small amount of rug adhesive to the backside of the rug, near the loose threads.
Step 3: Press the loose threads onto the adhesive, ensuring they are secured to the rug.
Step 4: If the loose threads are extensive, you may need to trim them using sharp scissors. Be careful not to cut any other threads or fibers.
Step 5: Allow the adhesive to dry completely before handling or moving the rug.
By following these step-by-step instructions, you can address common rug repair issues and restore your rugs to their original condition. However, if you prefer to leave the rug repairs to professionals or the damage is extensive, it may be time to consider hiring a rug repair service.
Tips for Choosing the Right Rug Repair Service
When it comes to selecting a rug repair service, it’s essential to choose a reputable and trustworthy provider. Here are some tips to help you make the right decision:
1. Research and Reviews
Start by researching local rug repair services and reading customer reviews. Look for providers with positive feedback, years of experience, and a proven track record of quality workmanship.
2. Specialization
Choose a rug repair service that specializes in the type of rug you need to repair. Different types of rugs require specific knowledge and techniques for proper repair and restoration.
3. Portfolio of Work
Ask the rug repair service for a portfolio of their previous work. This will give you an idea of their expertise and the quality of their repairs.
4. Certifications and Training
Inquire about the certifications and training that the rug repair technicians have. Look for certifications from reputable organizations or associations in the rug repair industry.
5. Free Consultation and Estimates
Reputable rug repair services often offer free consultations and estimates. Take advantage of this to discuss your rug repair needs, ask questions, and get a clear understanding of the cost and timeframe.
6. Guarantee or Warranty
Ask if the rug repair service provides any guarantee or warranty on their work. A reliable service will stand behind their repairs and offer reassurance that they will fix any issues that may arise after the repair is completed.
7. Insurance Coverage
Ensure that the rug repair service has proper insurance coverage. This protects you from any potential damages or accidents that may occur during the repair process.
8. Customer Service
Pay attention to the level of customer service provided by the rug repair service. Are they responsive to your inquiries? Do they take the time to understand your needs and address any concerns?
9. Pricing
While cost shouldn’t be the sole determining factor, it’s important to consider pricing when selecting a rug repair service. Compare quotes from different providers and ensure that the price is reasonable and aligned with the quality of work offered.
10. Recommendations
Ask friends, family, or neighbors for recommendations if they have had positive experiences with rug repair services. Personal recommendations can often provide valuable insights and help you make an informed decision.
By considering these tips, you can choose a rug repair service that meets your specific needs and ensures that your rugs are repaired professionally and effectively.